Host your Hugo blog on Google Cloud Storage
It has been a while since you first got this idea of building your blog…
You wish you could post some articles about your best tricks, workarounds, or code snippets, but the reality is that you are lost in the modern age of blogging platforms! Yeah… "should I use Medium or a self-hosted Wordpress site?"
I won’t discuss these solutions. I choose to use Hugo, a popular Static Site Generator (SSG) written in Go.
This post will show you how to host this kind of site on the Google Cloud Platform, for minimal cost and with an authentic certificate exposed :sunglasses:
First, the blog itself
You first need to get some basics of Hugo. Hugo is - fundamentally - not a server running your code and dynamically generating some HTML for visitors.
Hugo is a binary generating a once-for-all HTML code based on the articles you wrote with some Markdown or Asciidoc markup language.
So, all you need is this binary and let some magic happen:
# install hugo binary
brew install hugo
# bootstrap your blog project
hugo new site my-blog
# install a theme
cd my-blog
git init . && git submodule add https://github.com/luizdepra/hugo-coder.git themes/hugo-coder
Basically, this will generate the skeleton of you new blog, then add a predefined theme on top of it :cherries:
There are lot of themes, ready to use, listed right here.
Now it’s time to add some content to this blog:
# create a new post
hugo new posts/hello-world.adoc
# serve the blog and also show drafts
hugo server --disableFastRender -D &
# Hello World!
open http://localhost:1313 :tada:
You might want to customize some basic parameters like the domain name, menu items, footer, etc. So, feel free to do so by editing the config.toml file.
Another essential feature was to be able to highlight syntax in code blocks. A simple google search led me to this nice post by René Gielen. To make it work, I also had to install a few complementary gems:
gem install --no-document asciidoctor asciidoctor-revealjs rouge asciidoctor-confluence asciidoctor-diagram coderay pygments.rb
I had to add this CSS chunk in order to get rid of odd table borders… table td, table th { border: 0px; }
|
Alright, you should have it running and prettily arranged now!
Build and deploy
So, as of now, you have some content built on-the-fly by the local server. It’s time to generate your static website.
One easy command to remember:
hugoThis will generate your website according to the content you have written with some markup language, including the templates from your theme, the CSS, etc.
The HTML is generated under the public dir.
That’s fine, but you may want to publish it…
Let’s do it manually for now. In a future article, I’ll talk about how I’m actually automating these tasks with my containerized CI pipeline and some basic IAM service account usage.
So, let’s start with creating a Google Cloud Storage bucket. In GCP, navigate to "Storage > Browser" and create a new bucket.
There are a few things to know when creating a bucket to host a website.
-
the bucket must have the same domain name as your website
-
you will be prompted to verify the ownership of the domain name
-
Google Search Console helps you to verify the ownership of the domain by adding a TXT record to your DNS zone
-
-
you must place it in a single region
-
it must be configured to be public (read access only)

-
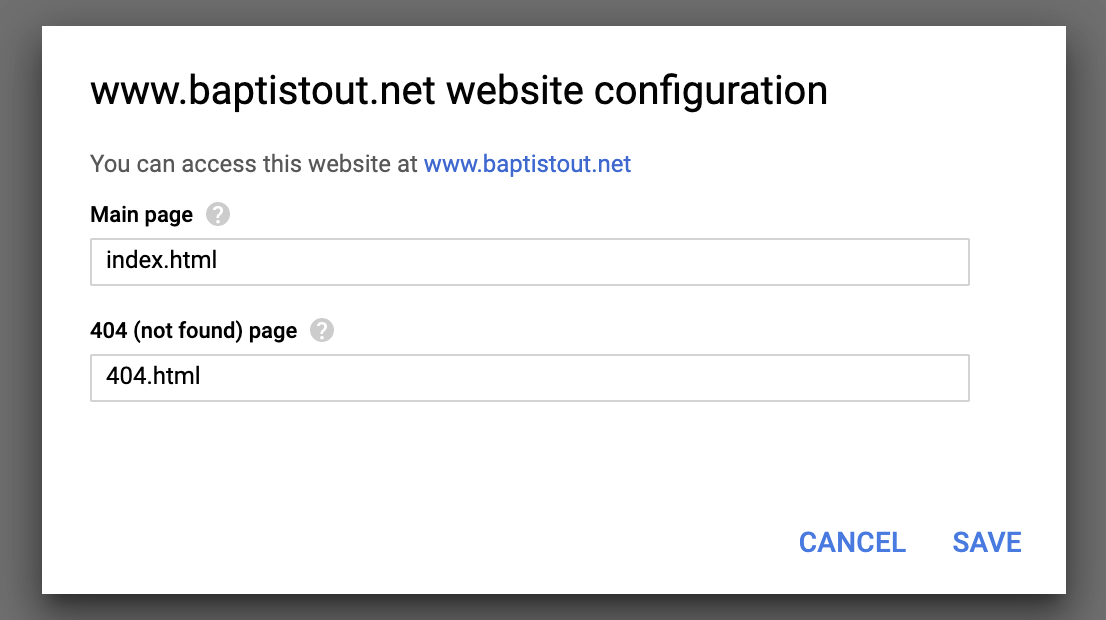
it must be configured to be a website and have associated index and error pages (see below)
Alright, from now you can push your generated website to your GCS bucket.
You will need the gsutil command, part of the Google Cloud SDK.
# brew cask install google-cloud-sdk
# gcloud auth login
gsutil -m rsync -d -r ./public/ gs://baptistout.net
Get a managed certificate
The last critical step is to expose a valid certificate and route the request to your GCS bucket.
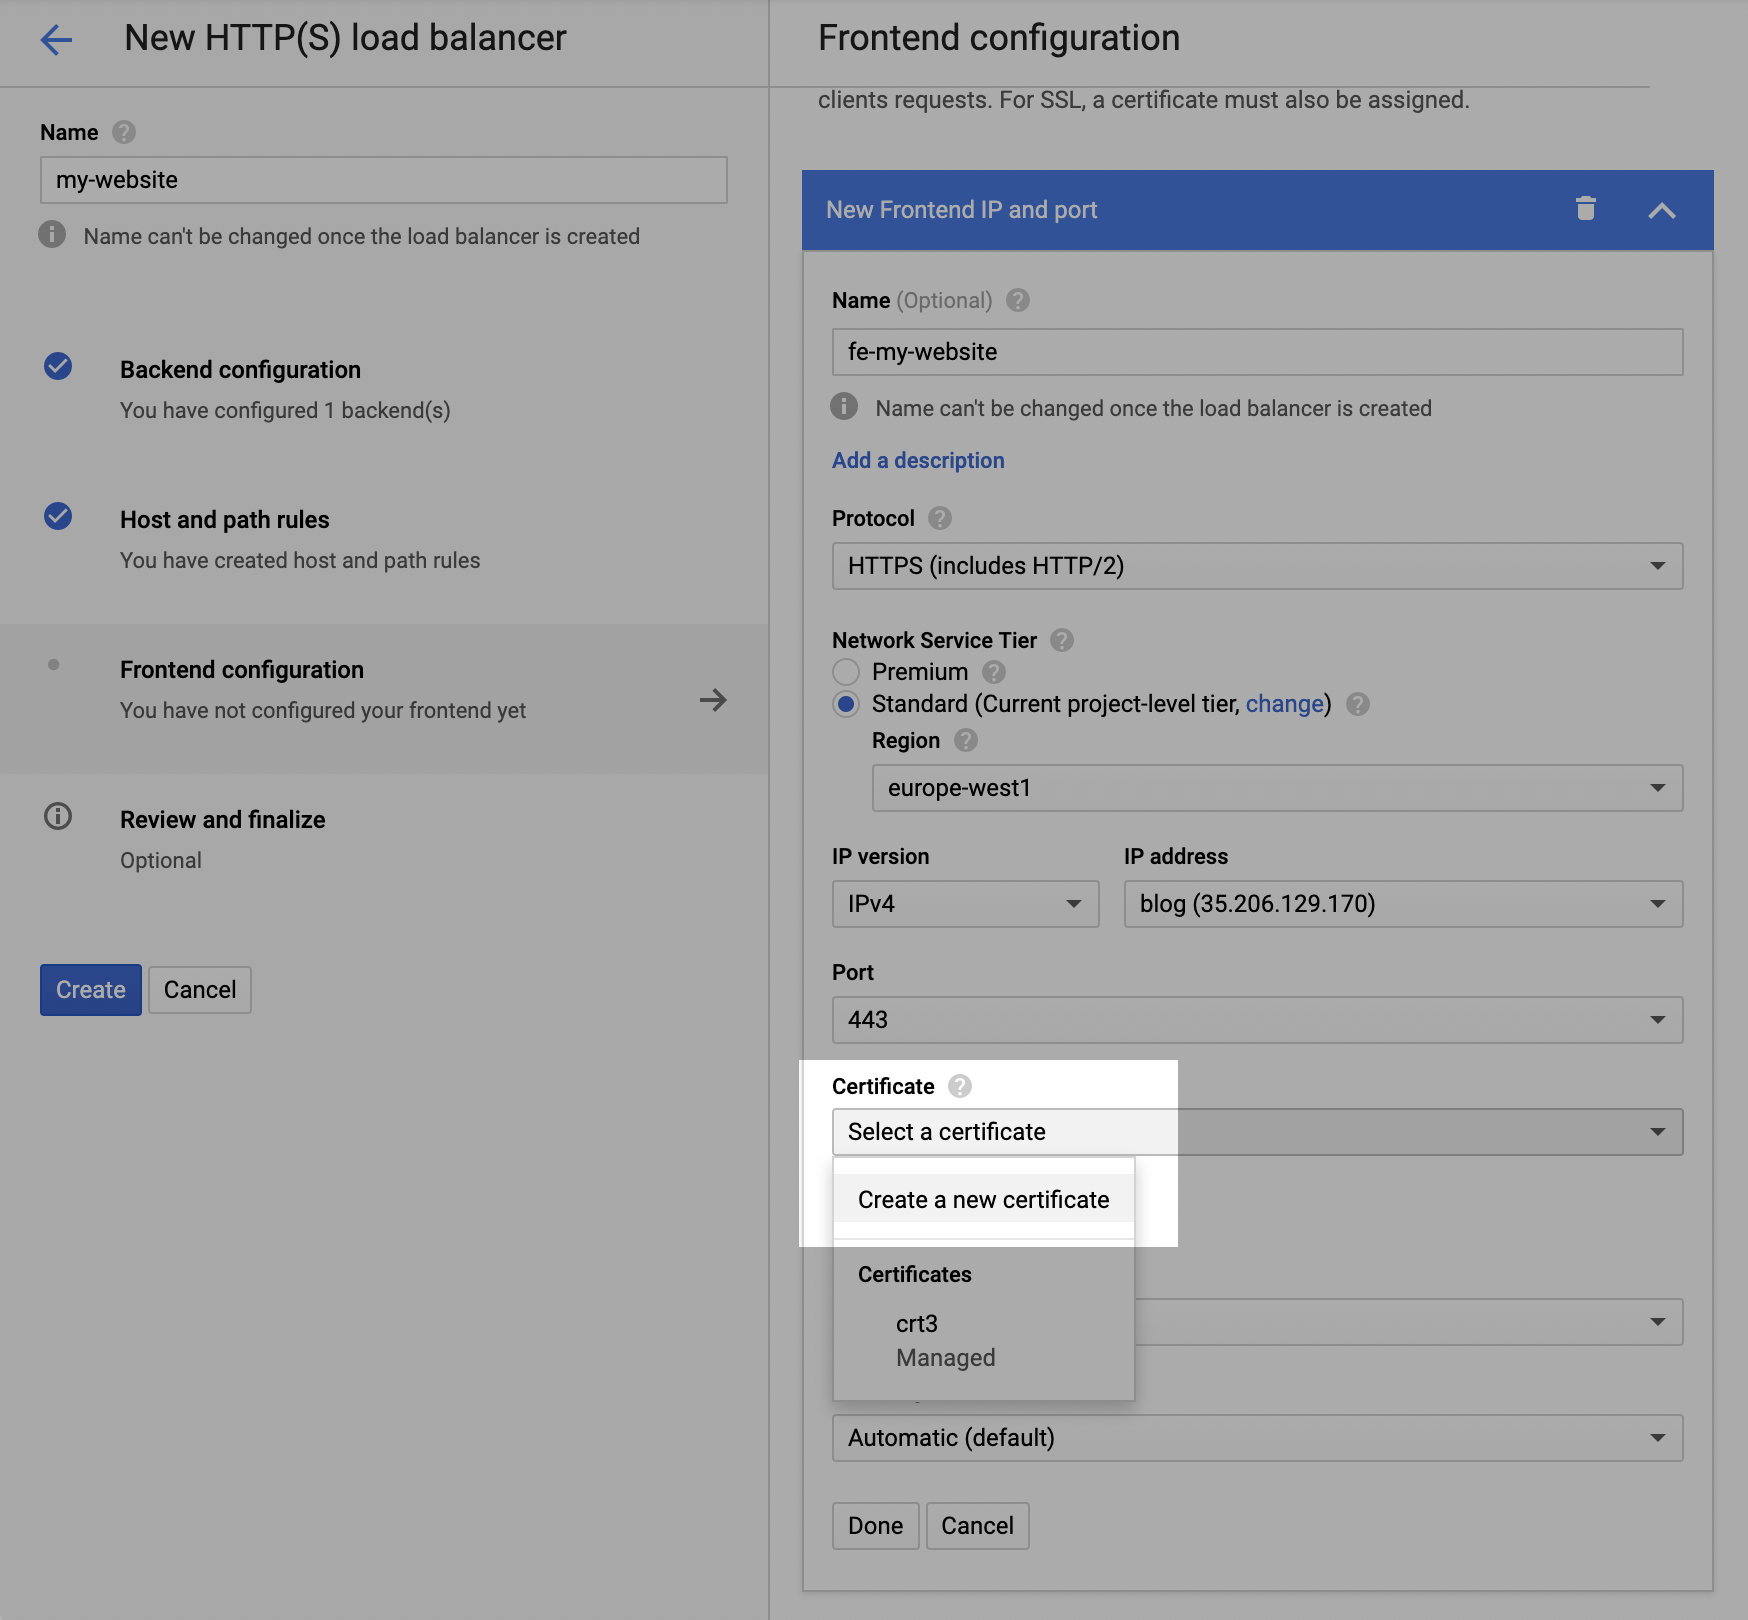
For this, you need an instance of GCP Loadbalancer. So, navigate to "Network services > Load balancing" in GCP. Here, the wizard will assist you through the options.
Select your bucket as the backend of your LB:

Then, in the frontend config, you can request a free certificate managed by Google.
Finally, some DNS configuration… First, proceed to the creation of some CNAME or A record, according to the IP you have configured just above.
Then, you may have to update your CAA apex record to authorize the Google PKI to deliver certificates for your (sub)domain(s):